

I had a taste for empanadas. My kids had all kinds of comments to that! But, I made them and they loved them. They are basically a dough with filling. I baked mine, instead of deep frying them, to keep them less fatty. To please the older child I left out the banana in the filling, but feel free to add or subtract to make the recipe your own. They are great the next day,too. Just heat in the microwave for 20 seconds or so. I know you are thinking what would I serve with this? A nice vegetable rice pilaf or casserole potatoes with a hot pepper in it. A bottle of Melbac or a beer would round out the meal. The kids had milk. Happy cooking!
Empanadas
Yield: 24 3-4 inch puffs
15 oz. can black beans, drained and rinsed
1/2 an onion, sliced
1 clove garlic, peeled
1/4 cup black olives, no juice
1/4 cup cilantro leaves (more or less, depending how much you love cilantro)
3/4 tsp sweet curry powder
Dash Berbere seasoning (optional)
1/4 tsp chili powder
Black pepper to taste
1 banana, peeled and broken in thirds
shredded, cooked chicken (optional)
1.) Place all of the above ingredients in a bowl of your food processor. Pulse a few times, scrape down the sides and pulse again. I used my metal blade to get this to a pretty smooth paste. Feel free to adjust the seasonings as you want to. Cover and place the filling in the fridge while you make the dough.
Dough:
1 cup milk
1 Tble unsalted butter
3/4 cup vegetable shortening (yes, like Crisco)
2 1/4 tsp (1 package) active dry yeast
2 1/2-3 cups flour
1.) In a small saucepan, heat the milk over medium heat until simmering. Look for the bubbles to form on the sides. Remove it from the heat and place in the butter and shortening. They will milk for the most part into the milk. Once it cools down to 110-115*, about 10 minutes, stir in the yeast to the milk. Let sit for another 10 minutes. You will see the yeast start to bubble.
2.) While the yeast is activating, measure out 2 1/2 cups of the flour into a large mixing bowl. Stir in the bubbly yeast mixture to the flour and stir. I just used a spoon and a Pyrex bowl. You will quickly get a ball of dough. Place the dough onto a floured covered surface. Knead the dough for about 5 minutes, adding in the rest of the flour as needed. You will get a smooth dough. Place it in a greased bowl and cover lightly with plastic wrap. Let it rest in a warm place for 30 minutes, or until doubled.
Put it all together! I rolled out golf ball sized balls of dough, on a floured surface, into circles about 4 inches across. Place 2-3 tablespoons of filling onto one half of the dough. Fold over the dough, making it look like a half moon. Pinch the sides together. You can press the edges with a fork to seal it really well. Place each one on a baking sheet. Bake in a preheated oven at 425* for 15 minutes or so. You can brush the tops of the dough with an egg wash to make them shiny before baking, if you want them to look “professional”.
We had a dipping sauce on the table too. Just mix 1/2 cup sour cream or yogurt, 1/2 cup mayo, and two or three chipotle peppers in adobo sauce. Puree together and serve. A little heat and flavor!
Some of ours had chicken in them, we finished the edges with a fork, so we knew which ones had meat in them. The vegetarian ones were just finished like a pie.

I had a hankerin’ for cake, but not the overly sweet, loaded up with frosting kind of cake. And, I had an idea of how to make it a special birthday cake. I love when an idea tastes and looks just like I wanted it to. I served the slices with a cloud of whipped cream. Again, not too sweet. I even promised my youngest that I would remake this for Easter Sunday.
Step one: Grease your 10″ fluted tube pan with shortening or else the cake will be hard to get out without breaking.
You could use a box of cake mix and just dye the layers (like in step 3), but I like to make cake from scratch. Here is my favorite recipe.
White Cake
2 cups flour 1 1/2 cups sugar
2 tsp baking powder 1 tsp vanilla extract
1/4 tsp salt 6 large egg whites
12 Tble unsalted butter, softened 3/4 cup milk
1.) Cream the butter and sugar together until light in color and fluffy. Add in the vanilla. This step should take you about 4 minutes to get it fluffy. While that is mixing, stir the flour,baking powder, and salt together in a bowl.
2.) Mix together the milk and egg whites. Add 1/3 of your flour mixture to the butter. Mix until combined. Stir in half of the milk and egg mixture; stir again. Scrape down the sides of the bowl as you. Add in another 1/3 of your flour, than the rest of the milk, and finally the last of the flour. Mixing after each addition.
3.) Now the fun part! Take out little bowls and your dyes. Portion out the batter into the bowls. Mix each color of the rainbow. But, save about 1/4 cup of white for your final layer. I needed more batter for the front part of the rainbow, since the pan is the widest at the bottom. Put the batter into plastic bags or piping bags. Pipe in the layers of the rainbow, starting with the pink/red. Than, pipe on the orange, but leave some of the red showing on both sides. Next comes yellow, pipe down the center of the orange, again leaving some of the orange layer showing. Keep going until you use up the colors. Your final layer should be white, piped just down the center of the purple.
4.) Bake the cake in a preheated oven at 350*. It will take about 40 minutes, but check it with a toothpick to make sure it is baked all the way through. Let it cool on a rack. Turn it over to release it onto a cake plate. When serving, serve it with fresh whipped cream, sweetened with a tablespoon of sugar. If you really like frosting, feel free to whip up a nice butter cream and frost the entire cake.

You could make this in two iron skillets, if you are like our household where some people (me) are vegetarians and some like meat (3 others). One family, two meals, all ready to eat at one time! Ta da! I love one pot dinners! Just throw a salad and maybe bread or biscuits on the table and you are ready for the applause. This comes together so quickly, and I had time for a small drink while it was all cooking in the oven while I washed the dishes. This is a great, winter comfort meal and you can easily adapt it to your tastes. Happy cooking!
Skillet Roasted Vegetables With Chicken
Serves 6 people
4 bone in chicken thighs 1 rib of celery, diced
4-5 bone in chicken legs 1 pound red potatoes or Yukon Gold, diced
1 tsp salt 1 carrot, peeled and sliced
1/2 tsp crushed black pepper 1 onion, halved and sliced
1 Tble Herb de Provence 2 cloves garlic, peeled and minced
1 Tble olive oil 1 cup sliced mushrooms
1/2 sweet pepper,any color you have
1/2 cup vegetable stock or your favorite beer
1/2 cup half and half
1.) Place the chicken in a bowl along with the salt and pepper, and herb de Provence. Toss to coat. Heat an oven proof skillet with the oil in it, brown the chicken for about 8 minutes and turn. Continue until the chicken is browned removing pieces as needed–you do not want to crowd the pan. A 12-inch pan holds everything, but if you are splitting up the veggies, you can use a 12 for the chicken and the 10 for the veggies.
2.) Preheat the oven to 400*. While the chicken is browning, I cut the veggies and place them in a large bowl. Use my list as a guide. If you have other veggies hanging around, feel free to put them in! Sometimes we will mix in spinach or swiss chard, sometimes its more celery and no carrots. Once the chicken is browned, add in the veggies, you can move the chicken around to get it all in the skillet. Pour in the beer, stock, and half and half. Place in the oven.
3.) Let everything bake for about 40 minutes. You want the chicken to cook until is 165*. Serve with your salad and/or bread.

I know what you are thinking. What do I serve with soup for a dinner? I made the squash soup and served this pie on the side. You could add a salad and bread, if you wanted more food. I am trying to add protein to every meal, so I turned to eggs. But, not too many eggs! The vegetables and herbs hide the taste of the eggs. I know, I am picky…
If you want this would be great for brunch, too. You can add in two more eggs if you like the taste of eggs. And, feel free to change up the vegetables and cheese! You can use whatever you happen to find in the fridge and change with the seasons. Happy cooking!
Vegetable Pie
Serves 6. And, really only takes about 45 minutes from beginning to end!
Your favorite pie dough-homemade or store-bought
8 oz. container of whole mushrooms, cleaned and sliced, stems removed
2 Tble unsalted butter
1 leek, washed and sliced, white part only
1 clove garlic, minced
1 Tble dried thyme
1/2 cup shredded cheddar cheese
3 eggs
3 Tble milk, or half and half
1.) Roll out you dough and put it into a 9-inch pie plate. Finish the top by crimping the sides. Set the empty pie shell to the side while you cook the veggies.
2.) In a skillet, heat the butter over medium heat. Saute the mushrooms, leeks, and garlic. If you are changing up the vegetables, now is the time to do it. You want the vegetables to soften and release their water, so your pie isn’t soggy.
3.) While the veggies are cooking, mix together the eggs and milk. Beat to break up the yolks. Season the vegetables with the dried thyme, add in any salt and pepper if needed.
4.) I like to put the cheese on the bottom of the crust, layer on the cooked veggies, and finally pour the egg and milk mixture over the top. Pop the pie into a preheated oven at 350* for about 25 minutes. I check the pie with a knife to make sure the eggs are cooked through. Just stick a butter knife in the center, if it comes out clean it is done. If you want to add in extra eggs, I would cook the whole thing on a baking sheet in case it spills over.
Mmmm….I wonder who will get the leftovers for a quick breakfast in the morning?!

What to make for dinner on a winter day? We make our menu on Sundays, so yesterday I was looking around in the freezer to see what we had. What did I find? Many little containers of squash that I had roasted and pureed in the fall! Bonus!! Here is my recipe for squash soup. You can use any squash you have: pumpkin, butternut, acorn, or even a combination. If you don’t have homemade, use canned pumpkin.
To roast the squash I cut them in half, lengthwise, and put them on a baking sheet with the cut side up. Remove the seeds; you can toast them for a garnish. Bake at 400* for about an hour or so. When fork tender, just puree the meat of the squash in a food processor. I usually do three or four and roast them together. Label and freeze any leftovers. Happy cooking!
Squash Soup
Makes enough for 6-8 servings. Because of the milk, this soup does not freeze well.
2 medium onions, diced 1 apple, peeled and diced
2 Tble olive oil 2 cups vegetable stock
2 garlic cloves, minced 4 cups squash puree, or a 29 oz. can of pumpkin
1/2 tsp dried thyme 1 cup milk or half and half
2 tsp dried sage Salt and pepper to taste
Dash of nutmeg
1.) In a large soup pot, saute the onion and garlic in the olive oil, over medium heat. This will take about 5 minutes. Stir in the spices and apple.
2.) Carefully, stir in the vegetable stock and squash puree. Let the soup cook for 20 minutes. If you want the soup to be really smooth, use an immersion blender to puree the soup. Stir in the milk and return the soup to warm. You do not want it to get to a full boil. Season with salt and pepper. Serve hot.
Keep any leftovers in the fridge and eat with in a few days. You can always share the batch with neighbors!

It’s cold here in Chicago, but I miss summer. How can I blend the two in a dinner? I made up some salsa verde in the summer and froze it. If you didn’t do this, you can buy salsa verde in the grocery store. Look for it in the Mexican food aisle. I worked today, so I made this last night after making our dinner. I just popped the crock for my slow cooker into the fridge overnight, and this morning set it on low for 10 hours. Voila–dinner was done when I arrived home. Or, you can whip this up in about half an hour cooking it on the stove top.This recipe is not spicy. You can add in a chopped jalapeno if you want spicier. This recipe is Maureen approved–which means an 11 year old liked it just the way the recipe reads. Feel free to add spice or not. Happy cooking!
Salsa Verde Chili
Makes 6 servings
1Tble olive oil 1 Tble ground cumin
2 ribs of celery, washed and diced 10 oz (about 1 1/4 cups) salsa verde
1 medium onion, diced 1/2 cup slow cooking barley
1 medium zucchini, diced 4 cups vegetable stock
4 cloves garlic, minced 1/4 cup fresh cilantro, optional
8 oz. navy beans, soaked and cooked 1 cup water, if needed
1.) Soak your beans overnight, or else, quick soak them in boiling water. Once softened, bring back to a boil and let cook for another hour or two. You want them to be fork tender, but not mushy. You can use canned beans, just make sure to rinse them well. Two cans will work for this recipe. Any white bean will work.
2.) In a skillet saute the celery, onion, zucchini, and garlic in the olive oil. I let it cook for about 5 minutes. You want the onions to start to brown. Stir in the cumin and salsa verde. If you are cooking the chili in the slow cooker, place the vegetables in the ceramic insert. If you are cooking on the stove top, keep going with the recipe.
3.) Stir in the drained beans, barley, and vegetable stock. Let everything simmer for at least 20 minutes. I like to chop the cilantro and sprinkle it in when I serve the chili. If it is looking too thick, add in the water. I season with salt and pepper just before serving. If you are cooking this in a slow cooker, mix everything together in the ceramic crock. Set it on low for 10 hours, or on high for 6 hours.
This is great the next day for lunch. I think it would freeze well, but we never seem to have any to freeze.

Did you grow up with these? I did not, but my husband gets REALLY excited about them. They are not on our menu very often, but on a crazy night that everyone is eating at different times, they are a life saver. I have tried to “improve” them by using real cheese and better buns, not worth it! The family just complains. So, if this is your first time making them, use real cheddar cheese, and a nice roll. Your family will never know the difference, and you will feel better. I serve this with potato chips or fries, I tried a salad and vegetable once, but again they complained. Tomorrow we will eat healthier, and they can go back to complaining about that. Happy cooking!
Bumstead Sandwiches
2 cans tuna, drained (4-5 oz. each can) Use the kind you like- I used albacore in water
2 hard-boiled eggs, peeled and diced
1/2 cup mayonnaise
2 ribs of celery, chopped fine
3 Tble onion, chopped fine
1/4 cup diced Velveeta (yes, that shelf stable ultra processed cheese food!)
6 Burger buns (the cheap ones are the ones they like!)
1.) Drain the tuna and place in a bowl. Mix in the mayo, eggs, celery, onion, and Velveeta. You can add in a little black pepper if you wish.
2.) Preheat oven to 350*. Fill each bun with the mixture and wrap each one in foil. Place the finished sandwich in the oven and bake for 20-25 minutes. You want the cheese to melt. If you have people eating at different times, you can leave the others in the oven with it off. They will stay warm for an hour or so. You can also reheat the sandwich in the microwave–take OFF the foil, place the sandwich on a plate and cover with waxed paper. Microwave it for 30 seconds or so, and eat.
Any extra sandwiches should be kept in the fridge, just heat as needed. One recipe makes 6 servings. Feel free to adjust the celery and onion to your tastes.
Remember, you can have a healthy dinner tomorrow.
To make hard-boiled eggs: bring a pot of water to a boil. You want the eggs to be under the water, so use a pot that will fit that many eggs. When I start the water, I bring out the eggs and keep them on the counter. When the water starts boiling, carefully place the eggs into the water with a slotted spoon. Let them boil for 12 minutes. When ready, use the slotted spoon to remove the eggs, and place them in a bowl of cold water. This will stop the cooking process.Once the eggs are cool, they are easy to peel and chop. I usually make a few extra for a snack or lunches the next day. Any extras get stored in the fridge! It just makes me feel better to add that– I have no doubt you know to store them there 🙂

Mmmm….wait until you try these cookies! Perfect with tea, milk, coffee, beer, wine; really anything! They are gluten free but I never point that out to my kids. We had a “cold” day here, so cookies were made and eaten. Why are they named monsters? I have no idea– This recipe came from my mother-in-law and no one knows the story behind it. But, I have the original recipe in her writing–makes 22 dozen cookies!! I have cut it down so it fits in a mixer and makes about 5 dozen. Maybe monster was the fact that it would take all day to bake this monster batch in a regular oven? Maybe it would make a monster family happy? Maybe it’s just fun to pretend to be cookie monsters while eating these cookies? Any way you look at it, the batch is gone in our house 😦
Happy baking and eating!
1/2 cup unsalted butter, softened 4 1/2 cups rolled oats
1 cup sugar 1/2 tsp salt
2 cups packed brown sugar 2 tsp baking soda
1 cup creamy peanut butter 1 cup chocolate chips
3 eggs 12 oz. plain m&m’s (I used Valentine ones)
1 tsp vanilla extract
1.) Preheat the oven to 350*.
2.) Cream the butter with the sugars and peanut butter. Add in the eggs, one at a time, mixing and scraping down the sides of the bowl as needed. In a large bowl, measure out the oats, salt, and baking soda. Add this mixture to the butter mixture in batches–usually, three small batches. Add in the vanilla.
3.) By hand, stir in the m&m’s and chocolate chips. You can do it in the mixer,but the m&m’s tend to break. Portion out the dough onto ungreased baking sheets. I like to use a small ice cream scoop to keep them uniform. My three-inch baked cookies take about 15 minutes in the oven. If you make yours smaller, they will take less time: bigger will take longer. I loosen them once they are out of the oven and let finish cooling on the baking sheets.
4.) They keep best in an air tight container at room temperature. I have had success mixing the dough, freezing individual portions, and baking them from frozen. They take about 20 minutes, from frozen.
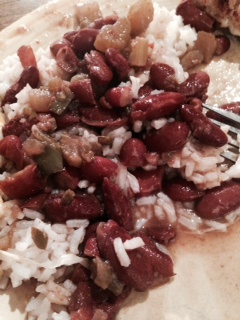
I love cooking in the morning and letting the slow cooker do all the hard work. Then, just finish up the rest and dinner is served. Tonight we had red beans and rice with alligator meat served over the top. Just about 10 minutes in the morning cutting vegetables and 15 minutes cooking the alligator. Dinner is done! If you are vegetarian like me, I a love a good grilled cheese with the beans and rice for dinner. Alligator is like chicken, and you can find it at Mariano’s or a game store. A little seasoning and a hot skillet or grill is all you need. Happy cooking!
Red Beans and Rice in a slow cooker Yield: 6-8 servings
1 pound dried red kidney beans 2 cloves of garlic, minced
2 Tble olive oil 3 1/2 cups water
3 celery ribs, diced 2 1/2 cups stock
1 medium onion, diced 1/2 tsp crushed red pepper
1 medium green pepper, diced 1 tsp salt
4 cups cooked rice (make just before serving) Cajun seasoning to taste
1,) Soak the beans in water over night. If you need to quick soak them, you can bring them to a boil for 2 minutes, remove from the heat and let sit for an hour. Drain.
2.) In a large skillet, heat the olive oil over medium heat. Saute the celery, onion, green pepper and garlic in the oil. This should take about 5 minutes to get the onions to soften. Meanwhile, place the drained beans in the slow cooker. Top the beans with the water, stock, crushed red pepper. Stir in the vegetables when they are ready.
3.) Set the slow cooker on low for 8-10 hours or on high 6-8 hours. Before serving, season with the salt and Cajun seasoning. Serve over the rice. If you have any extra beans and rice, you can refrigerate them for 3 days or freeze them for up to 6 months.
To cook the alligator, you can simply rub on some cajun seasoning. Heat your favorite iron skillet over high heat with two tablespoons of oil in it. Place in the alligator steak or pieces of meat, cook for 5-6 minutes. Do not over cook! Serve the meat over the top of the beans and rice. It’s like chicken with a fishy taste–according to 11 year olds.

SO I had some leftover ginger sugar from a doughnut fry. What is a girl to do? I couldn’t throw it out, but I didn’t want to just stick it in the baking cabinet to sit and wait for me to remember it is in there. I kept thinking back to molasses cookies rolled in the ginger sugar.Ta da- Perfect cookie to go with a cup of tea! Happy cooking!
Molasses Cookie with ginger sugar Yield: about 36 1 1/2 inch cookies
8 oz. unsalted butter, softened 3 cups flour (GF blend did not work!)
1/2 cup sugar 1 tsp baking soda
1 egg 1/2 tsp salt
3/4 cup molasses 3/4 tsp ground cinnamon
1/3 cup hot water 1/2 tsp ground ginger
1.) In a small bowl, combine the flour, baking soda, salt, and spices. In a mixing bowl, cream together the butter and sugar until you have no butter lumps. Add in the egg, mix, and add in the molasses. Mix until it is all combined. Scrap down the sides of the bowl as you need to. If you are using a mixer, use the paddle attachment.
2.) Add in half of your flour mixture to the butter mixture. Mix until combined. Pour in the hot water and carefully incorporate it in. The last of your flour goes in, again remember to scrape down the sides of the bowl. You will have a pretty thin cookie dough-don’t worry! Cover the bowl with plastic wrap and place it in the fridge for at least 30 minutes.
3.) While the dough is chilling, make your ginger sugar. In a small bowl, mix 1/2 cup granulated sugar with 1/2 teaspoon of ground ginger. Set aside. Line 3 or 4 baking pans with parchment paper.
4.) Preheat oven to 350*. After the dough has chilled, portion them into balls about 1 inch across. Roll each ball in the ginger sugar to cover it and place about 2 inches apart on the baking sheet. Bake for about 15 minutes, depending on the size of your balls. The bigger the ball the longer the cooking time. You will see them crackle on top as they bake. The edges will be form but the middle will remain soft.
5.) These cookies are best the day they are baked, but you can freeze the dough if you only want a few cookies! They will last a week in an air tight container, but they soften the longer they sit. Let them cool completely on the parchment before storing them.
